Building the Form
Blocks
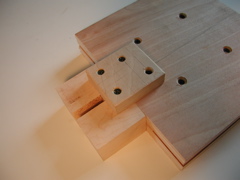
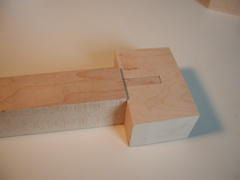 I started by making the maple head and tail blocks as well as the neck blank. The simple neck to head block joint was made with a tennoning jig on the table saw.
Form Blank
I used an inside form of the same basic design as I used for mandolin 001. Although this method worked, I may try an outside form next time to see if it would work any better. Without compound curves, it would be possible to use an outside form, but Im not sure if it would be any easier than this system.
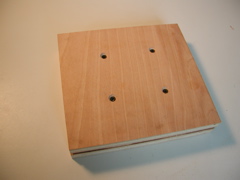
For this form, I used 3/4 inch birch plywood for the main body of the form. This type of plywood has many more plies and is a made from denser/ higher quality wood than standard pine plywood. This made for cleaner cuts and a better looking form. If there is any chance you will make another mandolin of the same design, higher quality plywood is definitely worth it. I used 1/4 pine spacers to make the form the same depth as the sides/ blocks and used four countersunk wood screws to secure everything together.
Attaching the Head Block
 I attached the head block with a sturdy 3/4 inch thick block secured with 2 screws in the block and two more in the form. This system is definitely a weak point in the forms design, but I havent come up with a better way to hold the head block in place. This method works, but its a bit clumsy tpo work with and isnt the most stable since the block can bend and therefore let the head block move (albeit only a little bit.)
Cutting It Out
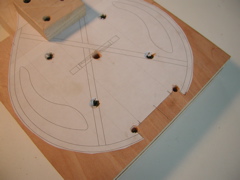
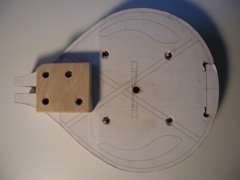
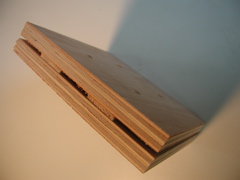
I first glued on the paper template I would use to cut out the top profile of the form. Next I drilled out the corners of the tail block section using 1/4 inch holes. These holes prevent interference with the corners of the tail block when it is snugly fit into place. I did this before cutting out the area where the tail block would be held. This saved a lot of trouble compared with my last mandolin when I forgot this step and had improvise a way to clean up the corners so the tail block would fit. I also drilled a hole in the center of the form to accept a dowel. This dowel will later be used for securing rubber bands that will hold the sides in place. I cut out the forms top profile on the band saw and smoothed it with a drum sander then friction fit the tail block into its recess. With a template glued onto the tail block, I was able to shape the tail block.