The Binding
The binding was made from two pieces of 0.080 inches thick by 1/4 inch tall rosewood purchased from Stewart-Macdonald. At 34.5 inches long, each of the two pieces used were long enough to make each side from one continuous piece of binding.
Routing
 I routed the channel for the binding using a table router, but many people use a hand held router or Dremel type tool to do the same thing. In my opinion, the table is the way to go for a flat top mandolin since the entire back and top can rest of the table while routing. I used a router bit with a bearing that rides on the mandolins sides for a consistent offset. This method was very reliable, accurate and took no time to set up. I used a combination of two different bits to achieve the desired offset. I took the bearing from a 1/4 inch flush cut bit and the cutter from a 3/8ths inch bit which gave me a 1/16ths inch wide channel. They have specialized (read expensive) sets of bits to do the same thing. These have interchangeable bearings allowing for offsets that match up with standard/ common binding dimensions. I set the depth of the channel to about 3/16ths of an inch with the routers built in depth gauge.
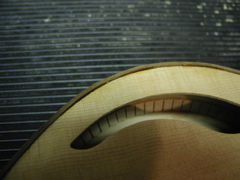
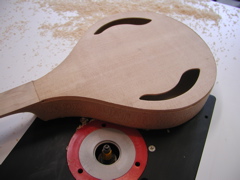 To minimize the chance of tearout while cutting the channel, I paid close attention to the direction of the grain. The bit should always be cutting downhill as much as possible. The ideal situation isnt always possible since the bit only turns one direction, but I generally started at the widest part of the body and then cut to the tail and the neck. This took four passes, one for each of the four quarters of the body.
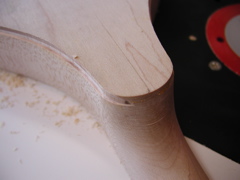
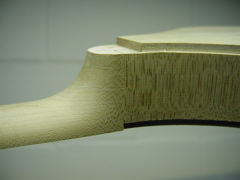
At the neck on the top side, I stopped just shy of the heel and then cleaned up the corner with a chisel. I went a bit too far at the neck on the back side and marked up the underside of the neck. These gouges luckily cleaned up of with a bit of recarving at the base of the neck. It really is only necessary to route to the heel on both the top and back since the button is going go there anyway.
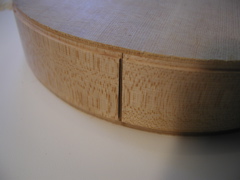
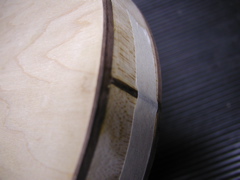
Tail Binding Slot
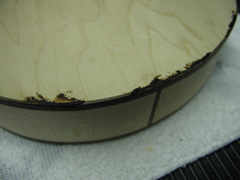
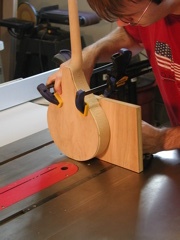 I cut the slot for the tail trim that would cover the joint between the two halves of the sides on the table saw. I used a rig that was quickly improvised using a piece of plywood screwed onto a miter gauge and then clamped directly to the mandolins body. One pass on the table saw was enough to make the 1/8th inch wide slot.
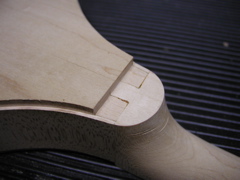
The Button
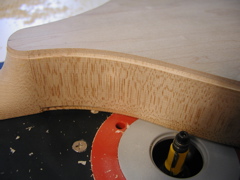
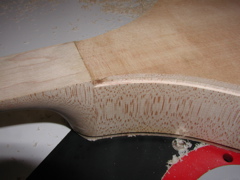
Unlike most buttons Ive seen, this one extends beyond the necks end and over the top of the sides. This is due to the very short heel section of the neck. The button looked strangely proportioned to me when I layed it out so it would only cover the top of the neck. I used chisels freehand to remove the wood from the button area and to smooth and flatten the final surface to accept the button. The depth matches that of the binding so they will flow together as best as possible when both are installed despite the fact that they will have different grain patterns showing and were made from different pieces of wood.
Bending the Binding
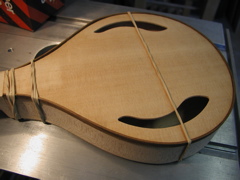 I used the same rig to bend the binding as I used to bend the sides. I secured the binding to the body with large rubber bands while they dried and cooled. Since the binding is so much thinner than the sides, it is much easier to bend and it is possible to get away with a less accurate bend. Its more important that the bend is very smooth so it doesnt lead to a small section of binding that cant be pulled up tightly to the body.
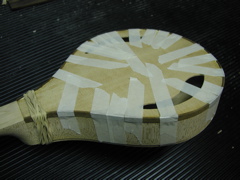
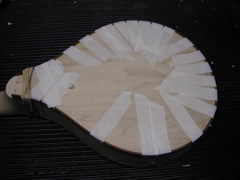
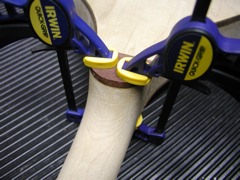
Gluing on the Binding
I first had to carefully cut the top binding to length so that the ends would fit snugly flow into the neck. I left the back a bit long to be trimmed to size later. To secure the binding while the glue dried I used masking tape. This was very easy to do with only one person. It took a lot of tape (as you can see) and some care in how you apply the tape and how tightly you secure it so that the binding would be held firmly in place while drying. I added a bunch of rubber bands to the heel area where the binding was especially stubborn.
Trimming the Binding
 Once the glue was dry, I planed down the top edge with a thumb plane. I sanded down the overhang on the sides using a spindle sander. Being careful to not take off too much material, I cut off the excess from the button ends of the binding for a tight fit with the button.
Tailpiece Pins
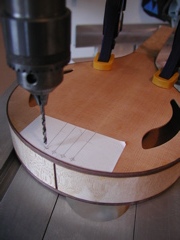
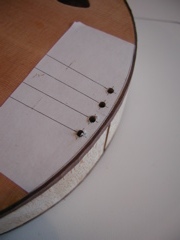 Using a paper template positioned with the binding as a guide, I drilled holes for the tailpiece pins. With the body clamped down securely on drill press, I drilled the four holes at least an inch deep each using an 1/8th inch brad point bit.
Attaching the Button
 I glued on the oversized rosewood button using wood glue. I made the button by cutting a piece of rosewood slightly thick, then slowly sanded the profile using the actual heel of the neck as a guide. I could have made the button much closer to the correct size as it was very difficlut to par down without hurting the rest of the neck once glued in place.
Installing the Tail Binding
 The tail end binding was glued with wood glue and masking taped in place to dry. I sanded the excess with the spindle sander again.
Filling Gaps
I wasnt able to pull the binding tight enough in some areas and had some small fit issues in others. These gaps werent too bad, but I could see them enough for it to bother me. I filled all of the gaps with a mixture of wood glue and rosewood dust. Afterwards, it was essentially impossible to see any of the gaps.