Cavity Covers
Making the Covers
I used a $3.99 trash can from Lowes for the cavity covers. Most luthier supply shops sell plastic plates for this purpose, but they cost a lot more. The can has flat sides walls that are about an eight of an inch thick. There is enough material to make covers for at least four mandolins. The material is very pliable and easy to cut, likely more so than commercial cavity cover material. I easily cut out pieces for the covers using an exacto knife and a straight edge. To finish the edges, especially for rounding corners and on larger curves, I used a disc sander. I predrilled the holes to screw the covers to the back of the body. The covers arent inset into the body like most are, rather just attached to the surface. Insetting the plates would have taken more routing but would also look more finished, especially if used with a set of countersunk screws.
Drilling for the Jack
To bore the hole for the jack, I used a Shopsmith horizontally with the table parallel to the drill bit. I clamped the body down flat, and used a forstner bit to make the hole which would accommodate the connections for the open-frame mono 1/4 inch jack.
Jack Cover
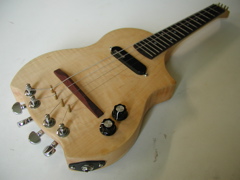
 I made the jack cover plate out of the plastic trash can material as well. It is roughly football shaped to allow for screws to fasten it to the body through at its ends. The plastic easily bent around the curvature of the lower bout of the body.
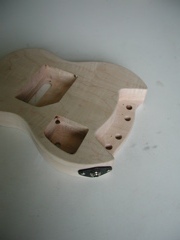
Connecting the Cavities
To get wires where they needed to be, I had to drill a few holess to connect the three cavities: the main pick-up cavity, the volume and tone knobs cavity, and the output jack cavity. To accomplish this, I drilled two holes freehand with an electric drill. The first I made by simply drilling from the bottom of the output jack hole in the direction of the knob cavity. The other hole was a bit more difficult. It started in the corner of the knobs cavity and was angled towards the main cavity, but also had to be tilted down so the drill would clear the body. Besides nearly plowing through the top of the main cavity when the bit exited at the main cavity wall, this method was easy and, of course, invisible when the cavity covers are in place.